Table of Contents
Adding an animated weather map
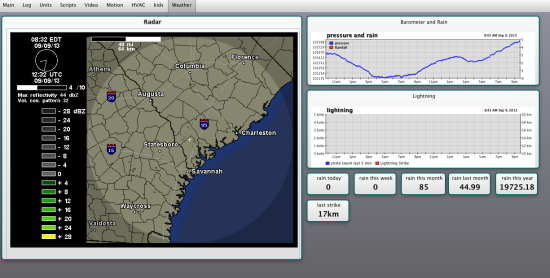
It is possible to embed content from other sources into a WebRemote page. I am building myself a weather page something like this:
Thats an animated gif of the weather from Wunderground which is one of my favorite weather sites. The same technique will probably work with other weather companies that will supply you with an animated gif to load but figuring it out is left as an exercise to the user. Wunderground also allows you to subscribe to them to get more frames and since you'll be loading data out of their site but not giving them add impressions you should definitely give them the tiny monthly fee to access more data.
XTension setup
Create a pseudo unit to hold the html and link that we'll be sending out to the web remote. Mine is called “Weather Radar Holder” but the name isn't important. Since we're only using the description field to hold the setup the rest of the settings aren't important. Leave it as non-dimmable and not assigned to any interface. This is the unit you'll later assign to the html snippet control in the Web Remote.
Create a global script. This is the script that will update the html in that snippet. I've named mine “update Weather Radar Holder” This takes the link we're going to get from the wunderground site and places it inside the little bit of HTML necessary to make it display properly.
property RawLink:"we'll fill this out in the next step"

set LinkWithForcedUpdate to RawLink --& "&random=" & time of (current date)
set FullLink to "<html><body><img src=\"" & LinkWithForcedUpdate & "\"></body></html>"

set description of "Weather Radar Holder" to FullLink
you'll notice that LinkWithForcedUpdate line seems unnecessary and has bits commented out. I was initially concerned that the browser would cache the image and require me to add some changing data to the end of the link in order to overcome it's caching and actually show new data. I've been testing this on Safari and it seems to be reloading fine each time the script runs. If you find that your browser just keeps showing you the same image each update and doesn't change it to the latest one then uncomment the second part of that line. This just adds an incrementing number to the end of the link. Wunderground ignores this completely and it will overcome the caching if it's a problem.
Lastly in XTension create a scheduled event that runs this global script every 10 minutes or so. If you're not actually viewing a page when the script runs nothing is actually loaded from wunderground, so you're not creating any extra traffic for them but there is no point in loading it faster than the radar itself is updated. You might choose to also add a button on the WebRemote page that runs the script and forces an update to get faster updates during an actual storm. But I'm seeing that most updates are about 10 minutes apart.
Getting the link from Wunderground
Look up your city or town on the wunderground site and mouseover the radar thumbnail. You'll have 2 choices popup, the nexrad radar and their excellent interactive “wundermap” for this we need to use the nexrad radar information so click that.
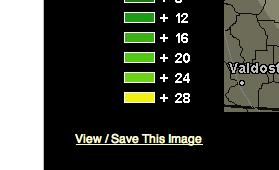
Use the radar controls at the bottom to turn on the animation and setup the number of frames and all the other data you'd like to see and click the update radar button. Once you have it all set the way you like you'll see a link at the bottom left of the map that says “view/save this image”
if you click that the image will open in a new window with a long url that holds all your setup and location data so that the graph can be recreated each time you load it. Copy that link out of the URL field of the browser and past it into the RawLink parameter value of the global script we created. Save the script again and we're ready to create the control in the WebRemote.
WebRemote settings
If you wish a separate weather page on your WebRemote page like I've done go ahead and create that now from the Admin menu. Once you're looking at the page where you want the map to display click the admin menu and select “add control”.
From the new control dialog select “unit description as html snippet” and click create. From the unit popup menu select the “weather radar holder” unit or whatever you called it. The radar should load up, but the control is the wrong size and in the wrong place so move it around and resize it till you have it where you want it. Sometimes these controls dont change the internal size along with the external so you may have to reload the page to see all your changes reflected.
Lastly remember to subscribe to the excellent wunderground site!


