Table of Contents
MJPEG Video Plugin
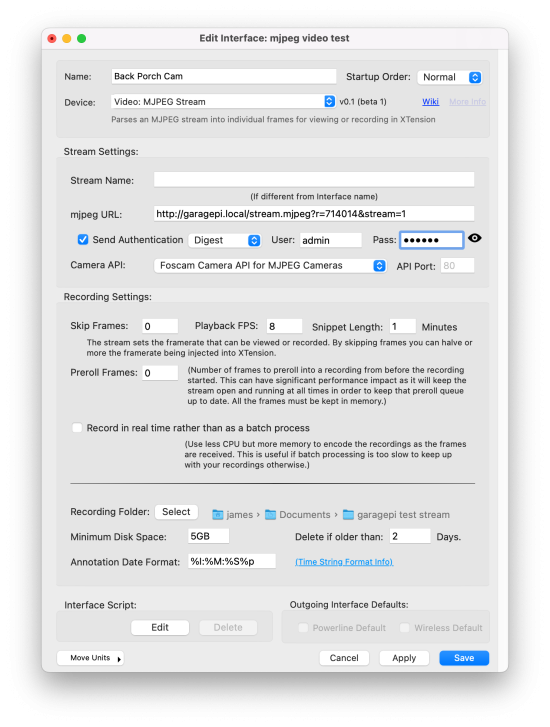
 The MJPEG Stream Plugin connects to anything that sends an “mjpeg” or motion jpeg stream. Many older cameras and other systems used this. It it an http image request that just keeps sending, pushing, one after another to replace the previous. All browsers now support this. Most modern HD cameras no longer will send you an mjpeg but it is in heavy use by many of the Raspberry Pi security camera systems. It is also what most SD older cameras supported.
For documentation on the settings that all the Video plugins share please see the Main Video Wiki Page.
For the MJPEG stream the “Recording FPS” field has been replaced with the “Skip Frames” field. In general you should setup the camera to send only as many frames as you wish to display or record. If that is not possible you can reduce the framerate that is sent upstream to XTension but filling in a value other than 0 in the skip frames field. For example if you are receiving a 10fps stream and set the skip to 1 XTension will get 5fps as it will skip every other frame. The plugin itself must still receive and decode every single frame and just ignores the skipped frames so this will take more CPU resources than just receiving the stream at the FPS you wish to send upstream to XTension.
In order to find the URL to use with a specific camera it is usually enough to open the camera interface in your browser, right click on the video display and select “open image in new window” if the video opens properly in the new window and begins playing then copy and paste that URL into the XTension interface and see if that works properly.
There are also extensive lists of cameras and all the video links on the internet. Usually a google search for the camera model number and “MJPEG URL” or something similar will turn up a list that can help.
Known MJPEG URLs:
This is a very short list of the cameras that I have that support this and is by no means complete.
Raspberry Pi Camera Software:
The Raspberry Pi Motion and other security camera programs seem to all have an MJPEG output option.
Foscam HD Cameras
For most older Foscam cameras I could not get any URL to work properly and so used the JPEG Refresh plugin. See that page for more info.
Foscam SD Cameras
I still have one much older Foscam camera in service. This works just fine with the MJPEG stream using this link:
http://???.???.???.???/videostream.cgi?user=admin&pwd=yourpassword
Even though the user and password must be embedded in the URL it is still necessary to set the “Send Authentication” checkbox and setup the same credentials there. This information is used for the Foscam Camera API you can select below for camera control. The authentication type for these cameras should be set to “Basic”.
Amcrest Cameras
Some amcrest cameras, especially the older ones, support an MJPEG stream as well as the RTSP one. In some cases you may wish to use the MJPEG stream as it will startup more quickly from an idle state than the RTSP stream, has less latency, and it uses much less CPU to process. It will also be limited in size and resolution. This might be useful when you are recording at full resolution and frame rate in the camera itself but still wish a low latency smaller or thumbnail size image you can use in the various interfaces in XTension. I have some cameras that this works jst fine in, some that it works for a short time before sending me only a few pixels and becoming useless, and some, like the Smart Home products that will not service it up at all.
For Amcrest cameras that support it the URL is:
http://???.???.???.???/cgi-bin/mjpg/video.cgi?channel=0&subtype=1
What this seems to do is attempt to connect to the “sub stream” and set it to MJPEG. Even on my cameras on which this does not work it still seems to set it to MJPEG. You may wish to try setting the sub stream ahead of time if the camera refuses to give it to you with only the link.
Note that the channel=0&subtype=1 seems to be necessary even if you would normally connect to the camera with the channel being 1. So try this first and if it refuses the connection then try other combinations of 0 and 1. It is not necessary to put the user/password into the URL itself, but it is necessary to set it in the “send authenication” fields below.
For all Amcrest Cameras it is necessary to set the Authentication Type to “Digest”
