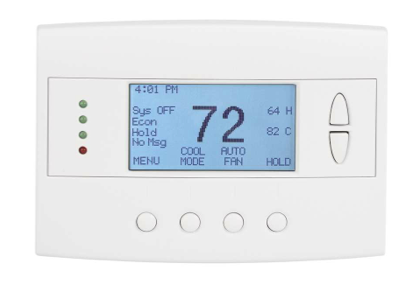
RCS RS-485 Thermostat
 As of build 827 XTension supports the RS-485 serial communicating thermostats from RCS. RCS has been in the communicating thermostat business forever and make a terrific product. The also make versions that accept changes and setbacks for all the various powerline and wireless communication protocols from X10 to ZWave and UPB but by far the most reliable is the 485 serial model.
The RCS thermostats are also the easiest to retrofit. They come in 2 parts, the thermostat which connects via 4 of the existing thermostat wires up to the second part, a control box at the furnace. The serial wire is run to the control box at the furnace and not down to the stat itself so it’s much easier to get a wire in there than it is to get one into the middle of a finished wall usually. The connection to XTension is via any RS-485 half duplex adaptor. There are RS-232 to 485 adaptors available for under $20 if you have existing adaptors or want to use an ethernet to serial adaptor. They also work with the FTDI chipset USB/485 adaptors and also the 485 port on the Barix Barionet 50 boxes. 3 wires are required for the serial, the data +/- and a reference ground.
Xtension can control any reasonable number of stats on a single port, but it does expect to be the port master at address 0. It should be possible to setup as an observer on the network and piggyback off of an existing install with another master controller but I do not have this equipment to test with, if you’re in this situation please drop me an email and we can discuss some testing that will be necessary to make sure it will work.
Once you have a connected thermostat and have create a device in XTension pointing to it you can create the units that you need to control the device. You can name the units anything that makes sense to you, but the addresses that you use will link them to the device on the thermostat. The naming convention for the addresses is the name, i.e “TEMP” followed by the address of the thermostat. So if you have only one then you’ll address the current temp unit “TEMP1”
- Current Temperature
- address: TEMP1 (“TEMP” followed by the stat address)
- dimmable: to store a number rather than just on/off
- receive only/ignore checks in list (to keep from changing it locally by mistake)
- Outside Temperature
- address: OTEMP1 (“OTEMP” followed by the stat address)
- dimmable
- NOT receive only. If you have an outdoor temp sensor connected to the stat then this unit will receive it’s value. If you do not have an outdoor sensor then you can set this unit to any value however you measure outdoor temp and it’s value will be displayed at the stat as the outdoor temp.
- Heat Setpoint
- address: HEAT1 (“HEAT” followed by the address)
- dimmable
- Cool Setpoint
- address: COOL1 (“COOL” followed by the address)
- dimmable
- MODE
- address: MODE1 (“MODE” followed by the address)
- dimmable
- (0=off, 1=heat, 2=cool, 3=auto, 4=emergency heat for heat pump system)
- Fan Mode
- address: FMODE1 (“FMODE” followed by the address)
- NOT dimmable (off=AUTO, on=on)
- Heat Stage 1 running
- address: HSTAGE11 (“HSTAGE1” followed by the address)
- not dimmable
- receive only/ignore clicks in list
- Heat Stage 2 running
- address: HSTAGE21 (“HSTAGE2” followed by the address)
- not dimmable
- receive only/ignore clicks in list
- If you have a single stage system you can leave out this unit but you will see an update for this in the log at startup.
- Heat Stage 3 running
- address: HSTAGE31 (“HSTAGE3” followed by the address)
- not dimmable
- receive only/ignore clicks in list
- if you do not have anything connected to this relay then you can ignore this unit, but you will see an update for it in the log at startup.
- Cool Stage 1 running
- address: CSTAGE11 (“CSTAGE1” followed by the address)
- not dimmable
- receive only/ignore clicks in list
- Cool Stage 2 running
- address: CSTAGE21 (“CSTAGE1” followed by the address)
- not dimmable
- receive only/ignore clicks in list
- Fan Status
- address: FSTATUS1 (“FSTATUS” followed by the address)
- not dimmable
- receive only/ignore clicks in list
- Vent Damper Status
- address: VSTATUS1 (“VSTATUS” followed by the address
- not dimmable
- receive only/ignore clicks in list
- this is for reading out the automatic setting the vent. It is also possible to control the damper output from XTension. If you need this command implemented before I get around to it please drop me a note and I’ll move it to the top of the list.
Xtension will regularly set the clock and date on the thermostat to keep them in sync. Additionally commands are available to set the setback mode and levels and the various offsets. These will all be implemented but if you wish to use them before I get to them please drop me a note and like the vent control I will add it sooner rather than later.
Make sure you’ve read the General Thermostat Notes
